Move Photos From Memory Card to Computer |
Previous  Next Next |
Here is one way of moving your photos from the memory card to the computer. I used a memory card reader rather than plugging the camera into the computer for greater flexibility and speed. Memory card readers are much faster and each memory card slot appears as a separate drive letter in Windows Explorer.
This is for Windows XP, but other versions of Windows will work the same.

Step 1: Open Windows Explorer
The easiest way is to right click on the Start Menu to bring up the shortcut menu. Click on Explore. Click on the plus sign (+) next to the C: drive in the left window pane so that all of the drives and drive letters are easy to see. Side note: the icons on the dark blue background are on the Quick Launch toolbar that is a part of Internet Explorer 5, 6 and 7.
Step 2: Insert the Memory Card Into the Card Reader
Click on the Cancel button when a dialog box appears asking what it should do.
Step 3: Notice the New Drive Letters
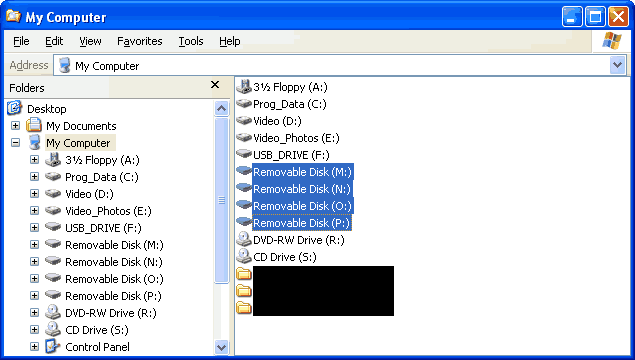
My 6-in-1 memory card reader has four slots for memory cards, so four new drive letters appear in Windows Explorer. In the example above, the new drive letters are M:, N:, O: and P:. My drive letters may be different than yours.
Step 4: Insert the Memory Card
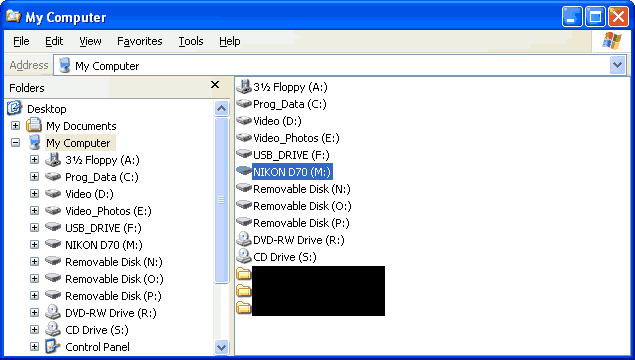
Insert the memory card. Notice one of the drive letter descriptions will change. In this case, drive M: changed to NIKON D70.
Step 5: Navigate Until You See a Filename for Each Photo
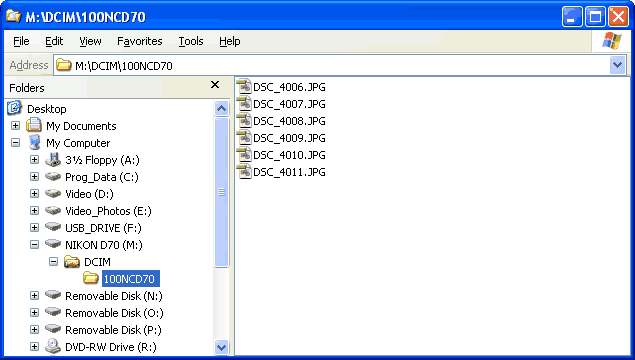
In the left pane of Windows Explorer, click on the yellow folder icons until you see the individual photo files in the right pane with a .JPG filename extension. The filenames might start with DSC or IMG. The icon next to each filename may be different than what you have. Photoshop changed my icons. Also, I changed a setting in Windows Explorer so that I could see the .JPG filename extension. Click on Tools, Folder Options, View, and uncheck Hide Extensions for Known File Types.
Step 6 (Optional)
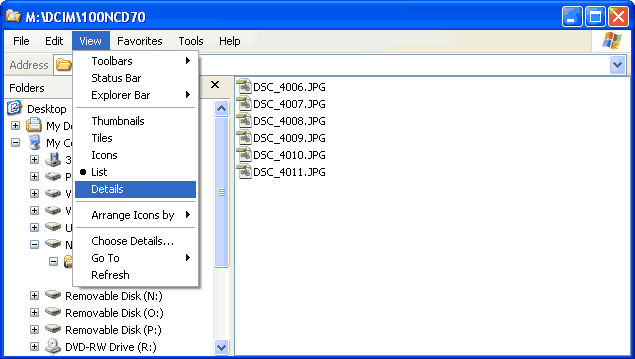
Click on View, Details on the menu so see when the photo was taken or the file size.
Step 7: Highlight the Files to Cut
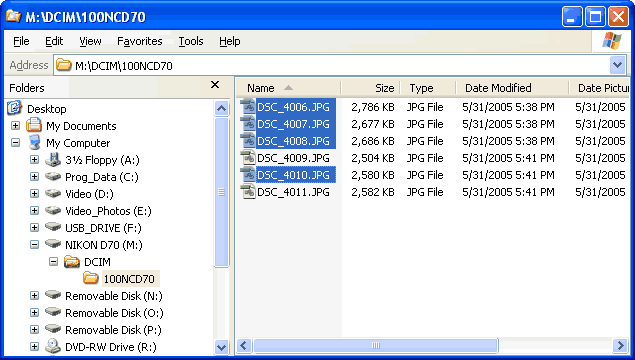
Highlight the files you want to cut and paste from the memory card to the computer hard drive. Here are some highlighting tips that work for all Windows applications (Word, Excel, email, etc.). To highlight a continuous range, click to highlight the first file (DSC_4006.JPG), press and hold the Shift key, click to highlight the last file (DSC_4008.JPG), release the Shift key. To highlight a noncontiguous range, press and hold the Ctrl key, click on each file you want to select (DSC_4010.JPG), and release the Ctrl key.

Step 8: Cut
Right click (not left click) on one of the blue highlighted files to bring up the shortcut menu. Click on Cut.
Step 9: Paste
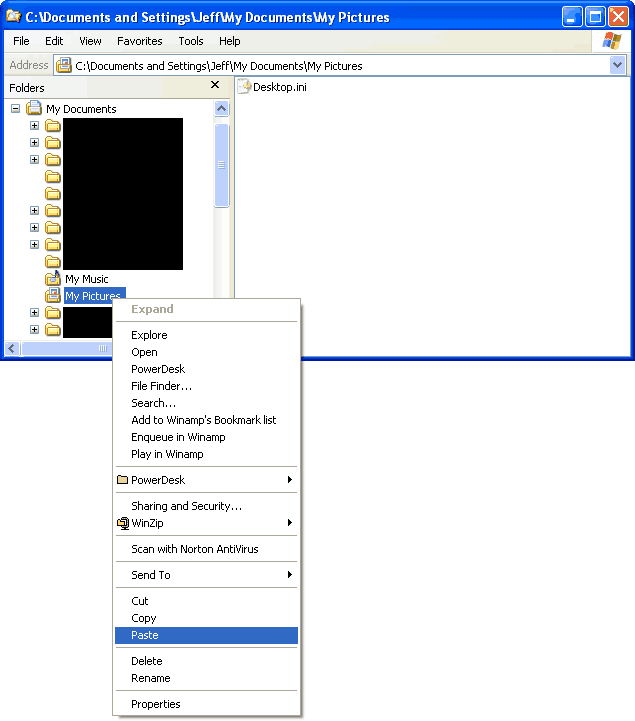
Using the left pane of Windows Explorer, navigate to the folder where you want to paste the photos. Normally, this is in the My Documents, My Pictures folder. Right click (not left click) on the folder for My Pictures to bring up the shortcut menu. Click on Paste.
Step 10: Watch
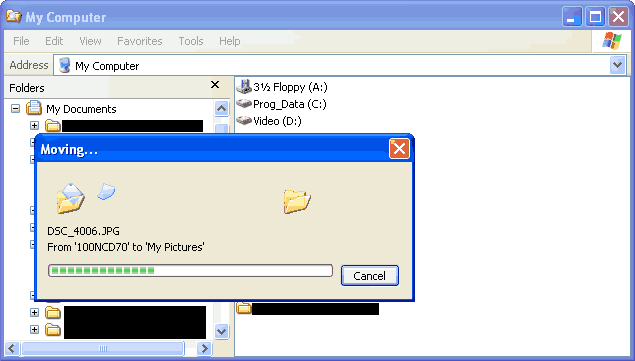
A dialog box will appear showing the status of moving the photos. If the dialog box says “copying” instead of “moving,” then you chose to copy and paste instead of cut and paste. That’s OK, but you now have to delete the photos off of the memory card if you want the memory card to be empty. If the photos are never deleted from the memory card and you keep taking pictures, then the memory card will eventually fill up and you won’t be able to take more pictures until (1) you buy a new memory card or (2) move some/all of the photos to the computer hard drive and delete the photos on the memory card.
Step 11: Verify the Files Were Moved
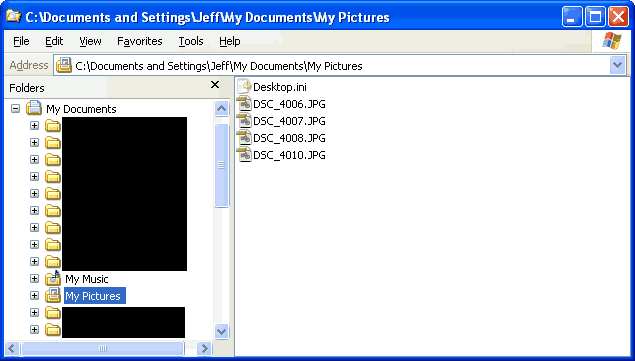
When the moving in done, then the photos will appear in the My Pictures folder. This is a good time to think about backing up your photos to an external hard drive, DVD or CD.
Previous
 Next
Next